How To:

Fitting Van Windows

READ MORE IN NEW CONVERSIONS BOOK

Find lots more details in the NEW Self Build Campervan Conversions book

Installing Campervan Windows

1. Installing Campervan Windows

So - you've got a nice shiny panel van with no windows... and you want to put windows in to make it a camper van.  What are your options?  Well, you can either pay someone else to do it or you can do it yourself.  It isn't that difficult to do yourself.  No really!  But it does involve a fair degree of confidence to cut a big hole in the side of your van.  It's not really a question of "what happens if I get it wrong", but more "whatever you do - don't get this wrong!".  You might also be interested in reading our article about campervan and motorhome window insulation mats.

To begin, you need to decide what kind of windows you want to fit. There are three main choices, Rubber Sealed Campervan Windows, Bonded Windows, or Framed Campervan Windows.

Rubber-mounted Campervan windows are the most 'old-school' and most van manufacturers no longer use rubber-mounted windows on factory-fitted windows.  Because rubber mounted windows are declining in popularity compared to bonded windows, they are not necessarily a cheaper option anymore.

Bonded windows are the sort of windows you see factory-fitted on most new-style vans (e.g. T5 Volkswagens and Transits after around 2000).  The bonded style windows generally give a bigger field of vision, and tend to look more 'modern' and flashy. These windows are basically panes of glass stuck or bonded onto a sticky strip on the metal of the van - the only thing holding them on is glue (i.e. there isn't any rubber, clamps, or screws actually holding them in).

Framed Campervan windows come in well engineered units with good thermal performance (most are double glazed acrylic) and often include built in blinds and mosquito nets.  For the DIY motorhome installer framed windows are probably the most sensible option, and it is this option we will discuss in detail here.

How to Install Campervan Windows

2. Planning the job - Campervan Windows

So, you want to know how to fit windows into a camper van?  The steps are pretty straightforward:

  1. Buy the window
  2. Carefully! Cut a hole in your van
  3. Depending on window type, prepare for fixing window into hole
  4. Fix window
  5. Seal it if required
  6. Go on holiday!

Tools you will probably need are:

  • An angle grinder
  • A jigsaw with lots of long metal cutting bits (you will probably break quite a few!)
  • Plenty of masking tape (some wide tape is useful)
  • A file
  • A good sharp knife
  • Some big bits of cardboard for templates
  • Some paint to protect the bare metal (hammerite or equivalent).


Making a Campervan Window Template

3. Make a window template:

This step will vary for different kinds of window. For bonded windows the window needs to stick to the van metal, so the hole for the window should be smaller than the window. For Rubber sealed windows, the hole should be slightly larger than the window to allow room for the rubber seal (double check the right number for your windows). Framed windows usually work by clamping the front and back of a frame around the metal, so it will be larger than the glass but smaller than the edge of the frame (framed windows usually come with good instructions on this so we won’t go into too much detail here).

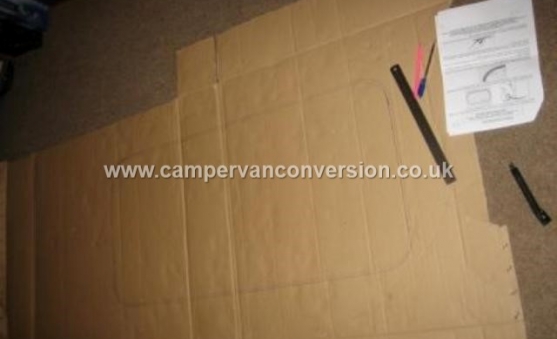
Sometimes it can be useful, especially for first timers, to create a template out of a big piece of cardboard.  For example for a rubber sealed window place the window pane flat on the cardboard and draw around it extremely carefully.  Move the window somewhere where you're not going to break it, then check that the length and width of your drawing matches the stated dimensions of the window pane. You should then make adjustments to the template as above, or as per your instructions that came with the window. Now cut the template out with a sharp knife (remember not to wreck your new carpet at this point!).

If you are confident you can transfer the measurements directly onto the van, but a template can help out the first couple of times.

Remember at every point that this is a precision operation!! The template must be EXACTLY the size you want it to be - draw precise lines, and measure at every opportunity.

Preparing the van to install new Campervan Windows

4. Preparing the van for Installing Windows

Most panel vans are designed with obvious places where windows would go - there are usually 'window shaped' sections in the panels where they would have put windows if the panel van had been a minibus version.

Obviously you need to be able to get at the metal, so take off any ply panels and insulation etc. Often you will find a metal strut going up the middle of the window shape - these are designed to stop the side of the van acting like a wobble board. Before cutting the hole, you are going to have to remove this strut. This may differ from van to van, but the easiest way for most DIYers is often to use an angle grinder to cut the top and bottom of the strut and then cut away anything sticking the strut to the metal. Be super careful with the angle grinder - you only want to cut through the strut and NOT the side of the van!!

There is a school of thought that says to do the window on the sliding door first.  The idea here is that if you do muck it up first time (which you won't) then it would in theory be easier to get a replacement door than a whole new integrated side panel!

Cutting a Window Hole in the Van

5. Cutting A Hole for the Window

This is it!   Check your measurements on the internal side - normally the lines should sit inside the double skin of the van so that you are only cutting through a single thickness of metal.  If you are using a template, blu-tak it to the panel and draw around it - once again, this is a PRECISION task!  Measure and double measure the shape you've drawn and prepare yourself mentally for what you're about to do - this is your LAST chance to change your mind and go and enlist some professional help.  If you're using a jigsaw to cut the hole, drill a start hole inside the scrap area of panel.

You've done it now!  Cut along your guideline as exactly as possible with the jigsaw.  One other thing here is make the effort to get GOOD jigsaw blades, fine ones for cutting thin metal.  Its quite possible to go through packets of blades if the ones used aren't quite right and keep breaking.  Just cut slowly, the rounded corners take extra concentration but a (good quality) jigsaw is a surprisingly user friendly tool.  You can cut from inside or out - cutting from outside gives you more room to work but make really sure you've adequately protected the van's paintwork from the jigsaw.  And 'Voila' - you should have cut out a nice window-shaped piece of metal from the side of your van.  A great tip here is that while you're cutting the hole, after every foot or so of cut put wide masking tape over the cut line and on both sides of the metal - the masking tape stops the loose bit of metal panel vibrating too much and should hold it in place as you make the last cut.

File down any really rough edges, measure the hole again (though if its too big - you're on your own!), clean and dry the edge and treat the metal with a metal paint (e.g. hammerite) to prevent corrosion. When it has dried, that's you ready to fit your window.

Fitting Rubber Mounted Campervan Windows

6. Fitting the window (rubber mounted)

So now you can slot the thick strip of rubber which often comes with the windows (check this or you may need to buy it separately) onto the metal of the van as this gives you your frame for the glass.  You obviously need to cut the rubber to the right length - try and make it slightly longer so that you end up with a really neat butt joint.  Once the rubber frame is in place you need to slot the pane of glass into the rubber frame such that the glass is held in place by the rubber - professionals make this look super easy, but the first time you do it its probably going to seem pretty epic - try and make sure you've got a friend there to help you hold things and work the glass into place.

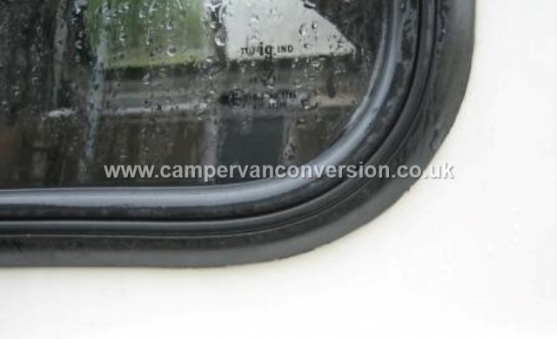
You're nearly there.....but now you need to secure the window in place.  You have just been able to slot it into the rubber (fairly) easily.  Without some kind of fixing there is no reason why it can't just as easily fall out!  Here you need rubber beading and the beading tool.  Basically you use the tool to fit the beading into the centre of the rubber frame (see photo above).  This pushes the frame out creating a more secure window seal.  A bucket of warm soapy water also helps to keep the rubber more pliable.

At this point most people also put sealant under the frame although you don't absolutely have to.  Remember you need proper window sealant and you basically push the nozzle up and under the rubber frame, squeezing a thin, and as equal as possible, amount round the whole frame.

Fitting Bonded Campervan Windows

7. Fitting bonded van windows

Fitting bonded windows is relatively straightforward, provided you've got all your measurements right so far... ensure the metal is clean and sealed with metal paint so that no bare metal is visible. You then need to 'key' the edges of the metal where the window sealant is going to be applied by rubbing it down with sandpaper.

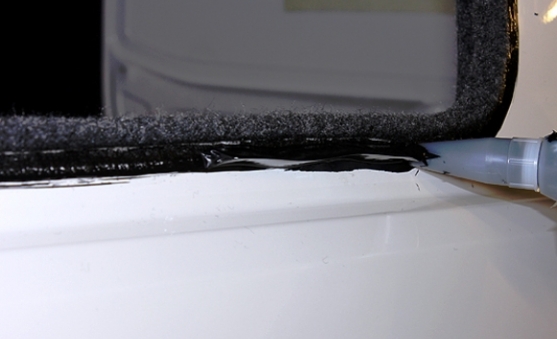
Consistently apply a thick line of sealant all around the window hole, as in the picture above. We cut the sealant nozzles further down than standard so it is easy to apply a thick beading.

Now, carefully, put the window over the hole and push it onto the sealant ensuring that there are no gaps and the window sits flush on the surface of the metal. It is a good idea to have a friend help you with this. Once stuck on, put masking tape along the edges of the window to hold it in place while the sealant dries. Clean up any squeeze out of sealant on the in or outside of the window and leave to dry.

Top-Tip:   One of the problems when fitting bonded windows is how the finish off the inside of the hole... there are a variety of solutions to this but often some form of running lining carpet up to the edge works reasonably well.  If you have any carpet or trim on the inside of the van around the window, you can tuck this around the edge of the window hole so sticking the window down holds it in place.


Fitting Framed Campervan Windows

8. Fitting framed motorhome windows

Finally, and possibly most simply, we have fitting framed campervan windows. Most come with instructions, but we've outlined the process here so you know what you're letting yourself in for.

Because the framed window will in general be thicker than the panel on your van, you need to select an appropriately sized piece of wood to put alongside the frame (as in the picture above). This will act like a wedge, and by pressing this into the middle of the window frame, the outside of the window will be pulled tightly against the outside of the van. Once you have selected and cut your pieces of wood, stick them onto the metal around the hole on the inside using high temperature adhesive or similar, and you are ready to fit the window.

The externals of the window will be larger than the hole you have cut, so fitting from the outside is relatively easy. You can follow the same approach for applying sealant as for the bonded windows, and have a friend help you put the window frame in the hole.

Go back inside and if yours is a window with screw holes, put these in now to tighten the whole thing together. To protect the window, leave the protective film on until you're completely finished or if it doesn't have a film you can normally close it's built in blind while completing this process.

A huge advantage of this method is that it leaves the thickness of the window frame to accommodate insulating and lining your van, so it is much easier to get a good interior finish than with bonded or rubber sealed windows.  Of course the fact that these are double glazed make them far more appropriate for good quality conversions, especially if you have spent time and money doing a good job on insulating the rest of the vehicle.
 

Finishing Off A Campervan Window Installation

9. Finishing off your van windows

So that's you done?  Well, not quite....

The big thing with putting in windows and in fact, cutting any metal in your van is that you will generate hundreds of thousands of tiny metal filings.  These little bits of metal get everywhere and will rust over time if left in your van.  Hoover, brush and hoover again to try and get rid of as many as possible.  This is one of the key reasons why it is good to do any drilling or cutting first, while the van is still a shell as it is easier to get at all the little nooks and crannies and clean out any filings.  Once cupboards and floors are fitted this is pretty impossible and you will miss some, only to find a nice pile of rusted metal if you come to lift up the floor in a few years time!

If you have got this far - WELL DONE!  Fewer and fewer people take on this task themselves - it is daunting but also pretty satisfying!